


This Halloween season, we’re teaming up with talented makeup artists across the United States to bring you a series of exclusive SFX makeup tutorials. In our fourth release of the series, PRO artist Rachel Quattlebaum re-creates a Glam vs Gore Scary Witch featuring a collection of products from Camera Ready Cosmetics.
Follow along as Rachel walks you through each step of creating the look!
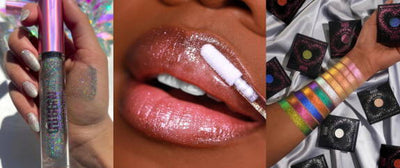
Shop The Look


These are the products she used:
- Coloured Raine Berry Cute Eyeshadow Palette – $25
- Eye Kandy Glitter Sprinkles – Jawbreaker, $7.50
- Inglot AMC Eyeliner Gel #77 – $16
- Lash Pop Falsies – $0 Money, $9.99
- Mehron Paradise Makeup AQ – Amazon Green, $11.95
- Mehron Paradise Makeup AQ – Dark Green, $11.95
- Mehron Paradise Makeup AQ – White, $11.95
- Stila Stay All Day Liquid Lipstick – Fiery, $24
- Mehron 3-D Gelatin Effects – 0.5oz Clear, $5.95
- Mehron Stage Blood – 1oz Bright Arterial, $4.95
Total Cost: $129.24
Get the look for less! Use eye palettes, liners and a red lipstick you already have on hand, and purchase individual refill shades versus the full sizes:
- Mehron Paradise Glitter – Silver, $4.95
- Ardell Double Up #201 – $2.63
- Mehron Paradise Makeup REFILL – Amazon Green, $5.95
- Mehron Paradise Makeup REFILL – Dark Green, $5.95
- Mehron Paradise Makeup REFILL – White, $5.95
- Mehron 3-D Gelatin Effects – 0.5oz Clear, $5.95
- Mehron Stage Blood – 0.5oz Bright Arterial, $2.95
Total Cost: $34.33

Step 1: Start with an extravagant, shimmering smokey eye.
Rachel creates a deep purple smokey eye using the Couloured Raine Berry Cute palette. If you’re not a fan of purple, get creative with any palette you have on hand. Choose a bold color theme that will complement the green paint you’ll apply all over the face in future steps.
Apply a silver eye glitter like, Jawbreaker from Eye Kandy, across the lid for an extra element of glam.

Step 2: Add dramatic eyeliner and voluminous false lashes.
Using a thin eyeliner brush, apply a thick black line of gel liner across the upper and lower lash lines. Wing it out past the corner of the eye. Finish your eye look with long faux lashes from any brand. Rachel uses Lash Pop’s bestselling $0 Money style.

Step 3: Begin creating the base of your green witch face.
Before you apply green makeup all over your face, start creating a highlighted base. Using a Beautyblender or makeup sponge, apply Mehron Paradise White Makeup under the eyes, across the upper cheeks, down the sides of the nose, and on the chin.

Step 4: Apply green makeup all over the face and neck.
Starting with the Mehron Paradise Makeup in shade Amazon Green, use a brush to apply the green face paint over the areas under the eye painted in white. Cover the rest of your face in the same green shade using a wet makeup sponge. Extend the color down your neck.

Step 5: Highlight and contour.
For Highlighting: Go back over the undereye areas with white face paint and blend into the green. Do the same just above your lip (cupids bow) and on top of the chin. Your goal is to create highlighted areas to soften the harshness of the all-over green.
For Contouring: Dip into the Mehron Dark Green shade and apply just under the cheekbones to create shaded definition.

Step 6: Add bold color to your lips.
Nothing says glam quite like a bold, red lip. Rachel uses Stila Stay All Day Liquid Lipstick in shade Fiery to fill in her lips.

Step 7: Begin the gorey detailing.
Now the fun starts! Using a black gel liner and detail brush, create a curvy, jagged line down your face. Start at the top of your forehead and draw a line down your nose, off to the side and down along the bottom side of your face. This forms the foundation of your bloody gash.
Once you’ve finished the outline, take a flat shadow brush and smudge the lines along the bottom of your face, as if you’re almost filling them in.

Step 8: Create the appearance of dripping blood down your face.
Using Mehron 3-D Gel, start at the top of the face and apply the gel formula along the outline you previously created. It’s okay if this is messy and not perfect; that’s the point. Add thicker chunks of gel in some spots, allowing the product to coagulate and clump together. Use your finger to move the gel around if it starts to run off your face.
Before the product dries, but while it’s still wet and tacky, apply Mehron Stage Blood with a brush to the bottom part of your face where you smudged out the outline. Start by filling in the outlines and creating a dark red base.
Take a small shadow brush and apply a liberal amount of Stage Blood (enough to wear it drips) and start applying on top of the red base you’ve just created. Allow the blood to drip and run down the face in parts. Continue this process everywhere you applied the 3-D Gel until the bloody gash is completed.

Step 9: Add detail to your hair.
For hair that’s parted towards the side of your face without the gash, make sure it’s curled and voluminous (the glam side) Apply baby powder or some other white loose powder and rub it in to create a gray, witch-like cast. For the other side of your hair (the gorey side of your face), spritz water into your hair to create a wet, greasy look.

Visit our YouTube channel for more step-by-step SFX tutorials. A special thank you to artist Rachel Quattlebaum (@rachel_suzanne_) for bringing this Glam Gore Witch vision to life.
Check out CRC's other SFX Tutorials:
Comic Book Pop Art by Kelly Tull
CATS with a Twist by Andie Piazza
We’re accepting your videos as part of our SFX tutorial series! Send submissions to marketing@crcmakeup.com for consideration.
Need something specific to create your SFX Halloween looks? Shop Camera Ready’s extensive collection of top special effects brands here. Don’t see what you’re looking for? Contact our Customer Experience Team for a comparable alternative, or to see if we can order the exact product you need.

Mallory Hatten
Beauty Editor / Camera Ready Cosmetics


Leave a comment