


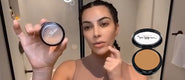
Shop the Look
The List
- Mehron Paradise Makeup AQ in Black, $11.95
- Melt Cosmetics Four Twenty Eyeshadow Palette, $58
- Ben Nye Clown White, $3.50
- PPI Add-A-Lash Adhesive, $6.75
- Graftobian Stage Blood, $5.50
TOTAL: $85.70
Step 1: Map out the eyes, nose, and mouth
Using a makeup pencil, lightly draw the outline of eye sockets (Kelly opts for a large winged out eye socket that extends out and upward toward her hairline), a nose, and the mouth. Next, use the shades Wax, Shatter, Blunt, and Full Melt from the Four Twenty Palette to create a warm-toned gradient along the outside of the outline. The deepest shades should be closest to the outline you created. Blend outward with the lighter shades.
Step 2: Add textured details
Using a fan brush, lightly dip into clown white brushing off any excess product. Apply crosshatch lines across your cheekbones and forehead using light brushstrokes.
Step 3: Fill in the eyes, nose, and add eyebrows
Fill in the eye sockets using a fine detail brush and Black Paradise AQ Makeup. Then, outline the top and lower half of this area with clown white to make them pop.
Complete the nose by outlining it with clown white and filling in the socket with the black makeup. Use eyeshadow to blend away any harsh edges.
Step 4: Create a creepy mouth
Apply additional crosshatches to the jawline and around the mouth using the fan brush and clown white. Next, using your fine detail brush, paint a frightening mouth using the black makeup. Once the black has dried, use eyeshadow to soften and blend the edges.
Step 5: Attach twine & move on to the neck
Use lash adhesive to apply small pieces of twine to the nose and mouth. This will provide a realistic stitching effect. Once the adhesive is dry, use clown white to outline the mouth, and add crosshatch details to the neck and décolletage.
Step 6: Final details
Using two pieces of twine, create a criss cross stitched effect across your eyes (have them criss cross for a stitched effect). Be sure the pieces are long enough to project away from your eyes so you can blink and look around comfortably. Using eyeshadow and the black makeup, add details to your neckline. For a spooky touch, add fake blood details like Graftobian Stage Blood to the neckline and mouth.
You're Camera Ready!
More Tutorials
Feeling inspired? We are, too! Enjoy more tutorials from our SFX Tutorial Series
Baby Yoda Inspired Makeup by @crisalexmua
La Llorona by The Official Lola Rose
Glam Skulltress by PaigeMarieMakeup
Beetlejuice + Miss Argentina by The Official Lola Rose
Comic Book Pop Art by Kelly Tull
CATS with a Twist by Andie Piazza
We’re accepting your videos as part of our SFX tutorial series! Send submissions to marketing@crcmakeup.com for consideration.
Need something specific to create your SFX Halloween looks? Shop Camera Ready’s extensive collection of top special effects brands here. Don’t see what you’re looking for? Contact our Customer Experience Team for a comparable alternative, or to see if we can order the exact product you need.
About Camera Ready Cosmetics
Camera Ready Cosmetics was founded in 2003 by Makeup Artist Mary Erickson. She dreamed of having a pro makeup showroom where artists could play with professional products without the typical makeup store attitude.
Today, our team of beauty industry veterans work together to curate the best quality products on the market. We partner with brands who respect the industry and formulate products for true working artists. You won’t find CRC in high-end malls, and we don't wear matching brush belts.
If you want to play with products for a few hours and buy nothing, that's okay ... come in and play! Our store is your playground.


Leave a comment