


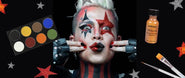
One of the easiest ways to kick up your SFX look is to add a cut or a wound, but mastering this technique can be pretty tricky if you don't know where to start. We partnered with SFX artist @Nsomniaksdream to share her favorite tips and tricks for creating wounds from scratch.
If you're squeamish or do not like the sight of fake blood, we do not recommend reading this blog or watching the tutorial.
It can be tempting to dive headfirst into the world of SFX makeup, but it's important to learn about the products you will be using before you begin. Any time you use a new product, perform a spot test on your skin before applying to larger areas to see if your skin is sensitive to the ingredients, and always work in well-ventilated areas. Make sure you gather all the tools you will need before you start, and don’t forget to have the proper remover for the products you’re using.
Most importantly, practice often, and have fun!
Tools Needed: liquid latex, stainless steel palette, double-ended spatula, disposable wedge sponge, wooden sculpting tool, setting powder, fx paint, stipple sponge, brushes (for painting), and fake blood.
Step 1: Add a quarter-size dollop of liquid latex onto your stainless steel palette. Apply a thin layer to the skin in the shape that you want the wound to be.
Step 2: Rip apart small sections of the tissue and roll into worm-like rolls. The rolled effect closely mimics healing skin and will make the wound look more realistic. Apply the rolls of tissue to your skin into the shape of the wound you want to create. If you need to move the rolls on the liquid latex, carefully move them using the spatula. Once you're happy with the placement, use the sponge to apply a thin layer of liquid latex to blend out the edges and set with powder.
Step 3: It's time to paint! Using your favorite fx makeup, start with a bright red color to resemble fresh blood. Add various shades of darker red, brownish tones, and even a hint of blue-based red to resemble drying blood, bruising, and the various stages of healing.
Step 4: Add fake blood, but resist the urge to add too much. Fill the inside of the wound with gel-based blood to mimic coagulated blood, and add a liquid SFX blood to the edges. If you want to create the look of road rash or blood splatter, take a stipple sponge and tap it lightly against the fake blood and the areas surrounding the wound.
PRO Tip: If you want the wound to look like it happened more recently, use a blood that is brighter red like PPI Fleet Street Bloodworks Drying Blood in the shade Fresh. If you want to make it look like an aging wound, opt for shades that have a brownish-red hue like PPI Fleet Street Bloodworks Drying Blood in the shade Dark.
Tools Needed: spirit gum, Nose & Scar Wax, double-ended spatula, wooden modeling tool, Vaseline, fx makeup, stipple sponge, brushes (for painting), and fake blood.
Step 1: To prep the skin for application, paint on a thin layer of spirit gum to help the wax adhere to your skin.
Step 2: Use the spatula to sanitarily scoop out some Nose & Scar Wax (the amount you need will vary based on how large of a wound you're creating) and warm it up by rolling it into worm-like rolls. Just like you did with the liquid latex, apply each roll on to your skin in the shape that you want the wound to resemble. Once the rolls are in place, smooth over the edges with the wooden modeling tool.
PRO Tip: This technique is best for creating a wound in an area that doesn't move very much, like on the décolletage or the top of your arm. Nose & Scar Wax is very pliable when it's warmed, but as it cools, very thin sections may be prone to cracking if it is moved around too much by body movement.
Step 4: Add a small layer of Vaseline to your finger tips and lightly smooth the edges of the rolls to create a seamless transition from the wax to your skin.
Step 5: Use the sculpting tool and spatula to shape the wound, and smooth any raw edges that you create.
Step 6: Paint and add SFX blood as desired.
Tools Needed: 3rd Degree Silicone Modeling Compound, wooden popsicle sticks (for mixing), stainless steel palette, 99% alcohol, double-ended spatula, disposable wedge sponge, setting powder, concealer that matches your skin tone, fx makeup, stipple sponge, brushes (for painting), and fake blood.
Step 1: 3rd Degree Silicone Modeling Compound consists of separately packaged formulas that create a modeling medium once mixed together. To ensure you do not cross-contaminate while scooping out the product, we recommend taking two popsicle sticks and labeling one A and the other B. Only using the A stick to scoop out of the A jar and the B stick into the B jar. It's important to mix the two formulas in a 1:1 ratio, so having a way to accurately measure the weights or eyeballing it with accuracy is key to success! Place the A and B formulas onto separate sections of your stainless steel palette, and use the spatula to mix them together.
Step 2: The application process is similar to the previous two methods. Apply the compound directly to the skin in worm-like rolls to create the wound. Continue shaping the wound using the spatula until you're happy with the overall shape. To blend the edges, dip the flat end of your spatula into 99% alcohol and press it against the edges of the wound and pull outward toward your skin. If you accidentally flatten it more than you wanted to, mix up a little more of the compound and build it up using the same worm-like roll technique.
PRO Tip: Work in small sections! Once the compound has cured, the product will harden. It’s easy to mix together a new batch of the compound to ensure you do not waste any product.
Step 3: The compound will be shiny once dry. This is great for creating a freshly healed burn, but if you want to have a more natural finish, use the disposable sponge and setting powder to knock back the shine.
Step 4: Apply makeup to make the wound look like it's part of your skin, paint, and add SFX blood as desired!
Adding SFX embellishments like fake glass, fake nails, or staples can really add to the effect. If you want to add additional props, be sure to apply them before adding fake blood. Simply add a layer of Pros-Aide to the inside of the wound and allow it to dry slightly. Once it is slightly opaque, attach the prop and hold it in place for a minute to allow the adhesive to grip onto it. Set with a light dusting of powder, and add SFX blood around the base of the prop for maximum impact.
How to Remove the Wound
Always practice safe removal techniques while working with SFX products. Ripping off the products can peel off skin cells and cause irritation, so use a professional-grade remover like Ben Nye Bond Off or PPI Telesis Super Solv Extra Strength Adhesive Remover to break down the products without damaging your skin.
Feeling Inspired?
Ready to see the difference between water activated paints and alcohol activated paints in action? View the video at the top of this blog, or visit our YouTube Channel! A special thank you to @Nsomniaksdream for creating this tutorial. If you have any more questions, we are here to help! Click here to reach out to our Beauty Advisors.
If you create a look using these techniques or any other SFX creation, be sure to tag @camerareadysfx on Instagram so we can see your work!
More Tutorials
Ready to watch more tutorials? We are, too! Enjoy more tutorials from our SFX Tutorial Series
The Different Types of SFX Blood with Kristen.B.Artistry
La Llorona by The Official Lola Rose
Glam Skulltress by PaigeMarieMakeup
Beetlejuice + Miss Argentina by The Official Lola Rose
Comic Book Pop Art by Kelly Tull
CATS with a Twist by Andie Piazza
Need something specific to create your SFX Halloween looks? Shop Camera Ready’s extensive collection of top special effects brands here. Don’t see what you’re looking for? Contact our Beauty Advisors for a comparable alternative, or to see if we can order the exact product you need.
About Camera Ready Cosmetics
Camera Ready Cosmetics was founded in 2003 by Makeup Artist Mary Erickson. She dreamed of having a pro makeup showroom where artists could play with professional products without the typical makeup store attitude.
Today, our team of beauty industry veterans work together to curate the best quality products on the market. We partner with brands who respect the industry and formulate products for true working artists. You won’t find CRC in high-end malls, and we don't wear matching brush belts.
If you want to play with products for a few hours and buy nothing, that's okay ... come in and play! Our store is your playground.


Leave a comment