


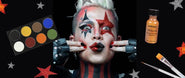
Meet @brittanylessard, the winner of our Summer SFX Makeup Contest! She is a SFX makeup artist based in LA, and in this blog, we will be sharing her favorite tips and tricks to seamlessly apply prosthetics.
What is a SFX prosthetic? A prosthetic is a 3D appliance used to create effects such as injuries, aging, and characters. There are five different types of premade prosthetics: foam latex, slip latex, gelatin, silicone, and transfer.
Prepping for Application
Before applying your prosthetic, cleanse the skin with a residue-free cleanser and pat the skin dry. Brittany recommends taking a cotton ball with witch hazel to wipe away excess dirt, oil, or makeup.
Next, place the prosthetic against the area you will be applying it to see how the edges are going to sit against your skin. Adjustments will need to be made prior to applying the adhesive.
PRO Tip: Gently tear away any excess material from the prosthetic. This will create jagged edges that are easier to blend in and hide rather than a straight cut you'd get using scissors.
Apply a small amount of Pros-Aide with a cotton swab to the center of the inside of the prosthetic. Avoid applying adhesive to the edges. Those will be secured in a later step.
Set the prosthetic aside to allow the adhesive to dry a little. Next, apply Pros-Aide to your skin where you have centering the prosthetic. This is essential in creating a strong bond and will make it easier to secure the edges.
You will know you're ready to apply the prosthetic once the adhesive has changed from a milky white to a slightly translucent shade. Next, carefully line up the prosthetic so that the adhesive makes contact with the adhesive on your skin. Foam prosthetics tend to be very delicate, so take your time to ensure you have it exactly where you want it before pressing it against your skin. Once the prosthetic is positioned in the correct place, press down firmly.
Now it's time to work on the edges! Apply a light layer of adhesive to the edges and to your skin, allow it to dry slightly, and press down. Once you have worked your way around the entire perimeter, apply a very light coating of adhesive along the edges to help blend it into your skin.
To ensure the edges of the prosthetic are blended seamlessly into the skin, use a wedge sponge to apply a thin layer of Pros-Aide along the seam where your skin and the prosthetic meet. If you aren't comfortable using a sponge, you may use a q-tip for this step, but be sure to apply the adhesive in very thin layers. Once the glue has dried, repeat this process at least three more times so that the adhesive has filled the gap where the prosthetic meets the skin. If the edges of your prosthetic are thicker, more layers may be needed.
The next step is to seal the prosthetic and prep it for paint. If the prosthetic is not sealed properly, the prosthetic will absorb the paint like a sponge and can impact how the paint blends.
Using a sponge, apply a thin layer of Pros-Aide over the entire surface of the prosthetic. Once dry, apply a generous amount of translucent powder like Ben Nye's Neutral Set over the prosthetic to take away any tackiness. The powder also helps reduce shine from the adhesive. Take your finger and run it lightly over the prosthetic to check for any areas that may have been missed. You will know you've missed the spots if they're still slightly tacky. Powder those spots, and then you are ready for paint!
To paint your prosthetic, you can use just about anything like water or alcohol activated paints to creme-based paints and your usual beauty products! Brittany chose a cream foundation shade from the Graftobian Appliance RMG Wheel in Derma Shades to match her skin tone and applied it with a brush before setting it with powder.
Since the foundation is too yellow for her complexion, Brittany used a diluted blue tone of alcohol activated paint to color correct and to make the prosthetic look more realistic. Real skin has a variety of shades, so she added "texture" using the splattering technique.
To perform this technique, take a splatter brush or a toothbrush, and dip it into an alcohol activated paint that has been sheered out with an activator. She created a reddish shade to match the tones in her complexion.
Once you've created your custom color, run your finger across the bristles to flick the paint onto the prosthetic. If you are spattering near the eyes, be sure to close your eyes while you are flicking the paint. Next, tap your finger lightly against the speckles and spots you created with the speckling technique to soften the appearance. Finally, apply a very thin layer of the foundation or original shade you used to cover the prosthetic to create dimension. This will make the spots you created look like they are a part of your skin instead of just sitting on the surface.
Just like that, you have prosthetic perfection!
Another popular and easy-to-use prosthetic is a transfer. Transfers tend to be lightweight, flexible, and comfortable to wear. They're convenient because they already have adhesive along the side that will sit against your skin.
Prep the Skin & Position the Transfer
Just like with the prosthetic, it's important to cleanse your skin to remove any dirt, oil, or makeup that would prevent the transfer from sticking. Take your time figuring out where you want the transfer because the entire backside is sticky, and once you've started applying it, it's best to keep it in place instead of trying to reposition it. The adhesive will lose a bit of stickiness each time you move it.
Apply the Transfer... Slowly!
The transfer has several pieces of non-stick paper it is applied to so that you may work in smaller sections. We recommend applying the center section first and working outward. Using one hand, hold the transfer against your skin, and with the other hand, slowly peel away the non-stick paper to expose the sticky transfer.
As you peel away the paper, use the hand that is holding the transfer against your skin to press the transfer against the skin as expose more of the adhesive. This will help prevent any air bubbles from getting trapped during the application process. Once you have applied the middle section, start working your way outward.
PRO Tip: Always peel the paper away from the center of the transfer and move outward toward the edges.
Blend the Edges & Apply Paint
The transfer Brittany applied has smooth edges that are acetone soluble, meaning they would melt and look more skin-like once acetone was applied. A q-tip dipped into a little bit of acetone will do the trick! To blend it even more and to seal the transfer for paint, apply a thin layer of Pros-Aide across the entire transfer and set it with powder, just like with the prosthetic application shown above.
Finally, paint the transfer to achieve the effect you're going for. Since the transfer Brittany applied is a burn transfer, she used alcohol activated paints for a more realistic look. These paints can be sheered out or made more opaque based on the amount of activator you use. This allows you to create a wide range of depth and tones. She added shine to the transfer with Ben Nye Glycerin to mimic fresh skin.
Once you're happy with the look you've created, give yourself a light misting of setting spray, and voila! You're camera ready!
More Tutorials
Feeling inspired? Watch the video at the top of this blog to see Brittany's step by step tutorial, or visit our YouTube Channel! If you have any more questions, we are here to help! Click here to reach out to our Beauty Advisors.
If you follow this or any of our other SFX Tutorials, don't forget to tag @camerareadysfx on social media!
Dog Makeup Look by Kristen B Artistry
Alcohol vs Water Activated Paint with Nsomniaksdream
The Different Types of Fake Blood with Kristen B Artistry
La Llorona by The Official Lola Rose
Glam Skulltress by PaigeMarieMakeup
Beetlejuice + Miss Argentina by The Official Lola Rose
Comic Book Pop Art by Kelly Tull
CATS with a Twist by Andie Piazza
Need something specific to create your SFX Halloween looks? Shop Camera Ready’s extensive collection of top special effects brands here. Don’t see what you’re looking for? Contact our Beauty Advisors for a comparable alternative, or to see if we can order the exact product you need.
About Camera Ready Cosmetics
Camera Ready Cosmetics was founded in 2003 by Makeup Artist Mary Erickson. She dreamed of having a pro makeup showroom where artists could play with professional products without the typical makeup store attitude.
Today, our team of beauty industry veterans work together to curate the best quality products on the market. We partner with brands who respect the industry and formulate products for true working artists. You won’t find CRC in high-end malls, and we don't wear matching brush belts.
If you want to play with products for a few hours and buy nothing, that's okay ... come in and play! Our store is your playground.


Leave a comment